Radon Mitigation: How Does It Work?
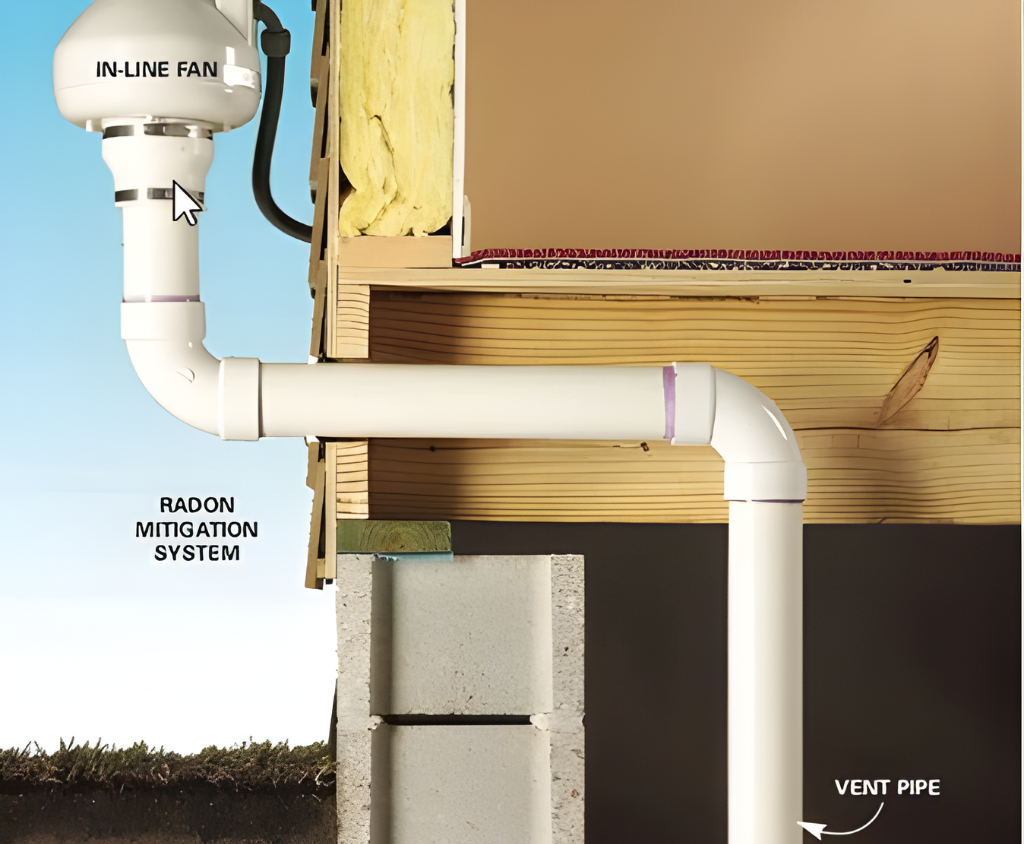
Radon Mitigation: How Does It Work? A Homeowner’s Guide to Sub-Slab Depressurization If your home tested high for radon, you’re likely wondering: Now what? The good news is that radon mitigation is a well-understood process—and Sub-Slab Depressurization (SSD) is the gold standard for most homes. Let’s walk through exactly what this method is, how it works, and why it’s so effective. What Is Sub-Slab Depressurization? Sub-slab depressurization is one of the most effective and widely used methods for radon mitigation in residential homes, especially those with basements or slab foundations. The goal? To redirect radon gas before it ever enters your living space. Here’s how it works: A mitigation specialist drills a small hole through your foundation slab. A PVC pipe is inserted into the soil beneath the slab (creating a suction point). A special radon fan pulls air from below the home and safely vents it above the roofline. This process creates a negative pressure field under the slab, which stops radon from seeping through cracks, gaps, or sumps into your home. Step-by-Step: How Sub-Slab Depressurization Systems Are Installed Every home is different, but the typical installation of a radon mitigation system includes the following steps: 1. Pre-Mitigation Inspection Before anything is installed, a radon professional tests your current radon levels and inspects your home for vulnerabilities—like cracks, sump pits, or gaps around pipes. 2. System Design Based on your home’s layout, slab type, and soil permeability, a customized radon system is designed to ensure optimal airflow and radon capture. 3. Suction Point Creation A small core hole is drilled through the slab—typically around 3 to 6 inches in diameter. A suction pit is dug beneath the hole to improve airflow. The PVC pipe is sealed in place using airtight caulking or fittings. 4. Fan & Vent Installation A radon fan is installed in an unoccupied area (like the attic, garage, or outside), and piping is run vertically to release the radon gas above your roofline, away from windows and openings. 5. System Monitoring & Testing A U-tube manometer is installed as a visual indicator to show the system is running. After installation, a post-mitigation radon test is essential to verify success and ensure your levels are below the EPA’s 4.0 pCi/L action level. Why Sub-Slab Depressurization Is So Effective Homeowners love SSD systems for a few key reasons: Highly ReliableWhen installed correctly, SSD systems consistently reduce radon levels and meet all EPA and NRPP standards. Low Operating CostsRadon fans are energy-efficient and require very little maintenance. The system runs quietly and continuously in the background. Continuous MonitoringPressure monitoring devices ensure the system is always functioning properly and radon isn’t building up undetected. Multi-Purpose BenefitsBesides radon, these systems also reduce moisture and soil gas contaminants like VOCs in your basement. It’s a win-win. Works in Old or New HomesWhether you live in a century-old home or new construction, SSD can be adapted to fit. It’s even used in commercial properties. What will it look like? Odds are many of your neighbors have a system installed and you never noticed. Interior: On the interior of the home it looks like any other plumbing system. It’s typically a 3-4in PVC pipe that goes into your slab, similar to a sump pump. Can you spot the radon mitigation system? (Hint: it’s on the left) Exterior: The pipes can be routed through the home and terminate through the roof, but typically you will see a white fan attached to the side of the home and the tubing routed around the ease of the roof with the exhaust terminating above the roof. Protect Your Family with a Proven Radon Mitigation Method Radon doesn’t have to be scary. With professional installation and a trusted partner, mitigation becomes just another smart part of the homebuying process or ongoing home health plan. At Lungera, our systems are: Professionally designed and certified to national standards Backed by post-mitigation testing guarantees Built with homeowner aesthetics and long-term durability in mind Easy to schedule with upfront pricing and no surprises Need radon mitigation in Louisville or Southern Indiana?We’re here to help. Our packages are tailored to meet your goals whether you’re selling, buying, or staying put.
The Science of Radon: From Discovery to Present Day
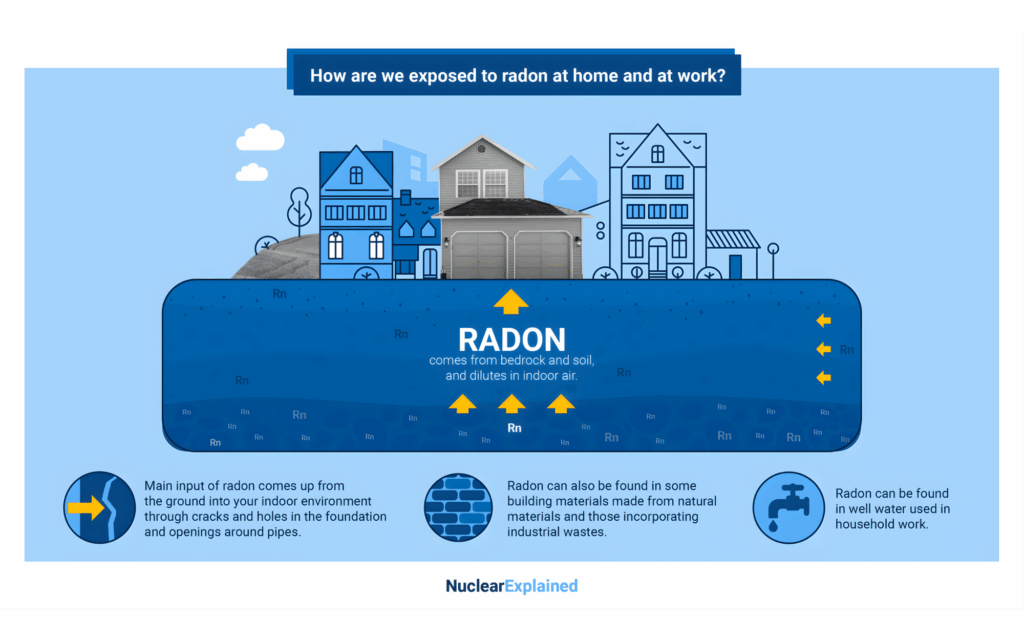
The Science of Radon: From Discovery to Present Day Discovery of Radon Radon was first identified in the late 19th century during the study of radioactive elements. In 1899, physicists Ernest Rutherford and Robert B. Owens discovered a radioactive gas emitted from thorium, which they termed “emanation.” Shortly after, in 1900, German chemist Friedrich Ernst Dorn observed a similar phenomenon with radium and called the gas “radium emanation.” It wasn’t until 1908 that Sir William Ramsay and Robert Whytlaw-Gray isolated this gas and determined its properties, naming it “niton” (from the Latin word for shining, “nitens”). By 1923, the gas was officially named radon, aligning with the nomenclature of other noble gases and marking a pivotal moment in the history of indoor air quality research. Creation of Radon Gas Radon gas (Rn) is a noble gas, specifically the heaviest and the only radioactive one in its group. It is produced through the radioactive decay of radium-226, a decay product of uranium-238, found ubiquitously in soil and rocks. This decay sequence can be summarized as: Uranium-238 decays to thorium-234, emitting alpha particles. Thorium-234 decays to protactinium-234, emitting beta particles. Protactinium-234 decays to uranium-234, emitting beta particles. Uranium-234 decays to thorium-230, emitting alpha particles. Thorium-230 decays to radium-226, emitting alpha particles. Radium-226 decays to radon-222, emitting alpha particles. Radon-222 has a half-life of about 3.8 days, after which it decays into a series of short-lived radioactive progeny, ultimately forming stable lead-206. Understanding this decay process is essential for radon testing and identifying long-term lung cancer risks in homes and commercial buildings. Illustration from: www.iaea.org Mechanism of Radon Entry into Homes Radon gas is released from the ground and can accumulate in buildings, particularly in confined areas such as basements and crawl spaces. The mechanisms of radon entry include: Soil Gas Infiltration: The primary entry route is through the soil gas infiltration. Differences in air pressure between the inside of a building and the soil around it can create a vacuum effect, drawing radon in through cracks in the foundation, construction joints, and gaps around pipes. Building Materials: Some building materials, such as concrete and granite, can emit radon, although this is typically a minor source compared to soil gas infiltration. Water Supply: Radon can dissolve in groundwater and be released into the air when water is used for household activities like showering and cooking. Homes with well water may need specialized radon mitigation systems to address this. Health Effects of Radon Radon itself is chemically inert and poses no direct threat when inhaled. However, its decay products, known as radon progeny or daughters, are radioactive and can attach to dust and other particles in the air. When inhaled, these particles can become lodged in the lung tissue, irradiating the cells and potentially causing damage. Prolonged exposure to radon decay products increases the risk of lung cancer, making radon exposure the second leading cause of lung cancerafter smoking. This is why indoor air quality testing is now a standard recommendation from health organizations. Historical Context and Modern Understanding Early 20th Century In the early 20th century, the health risks associated with radon were not well understood. It was primarily studied for its radioactive properties and potential therapeutic uses. The first significant health concerns arose from studies of miners, particularly uranium miners, who exhibited high rates of lung cancer due to prolonged exposure to radon and its progeny in poorly ventilated mines. Mid to Late 20th Century By the 1950s and 1960s, more systematic studies linked residential radon exposure to lung cancer risk. The development of sensitive detection methods allowed for more accurate measurements of radon levels in homes. The Environmental Protection Agency (EPA) in the United States and similar organizations worldwide began to establish guidelines and recommend radon testing in homes, particularly in areas with known uranium deposits or elevated risk. Present Day Today, radon is recognized as a significant indoor air pollutant. Testing and mitigation have become standard practices in many countries. The EPA recommends that homes be tested for radon gas and that mitigation measures be taken if levels exceed 4 pCi/L (picocuries per liter). Modern radon mitigation techniques include: Soil Suction: Systems that draw radon from beneath the house and expel it outside. Sealing Cracks and Openings: Reducing radon entry by sealing foundation cracks and openings. Ventilation: Increasing ventilation to dilute indoor radon concentrations. Water Treatment: For homes with radon in the water supply, treatment methods like aeration or activated carbon filters can be used. These solutions are especially critical during real estate transactions, when compliance with radon guidelines is often required before closing. Conclusion The journey of radon gas from its discovery to our current understanding highlights significant advancements in both science and public health. While radon poses a serious health risk, particularly for lung cancer, effective radon testingand mitigation strategies can significantly reduce this risk, ensuring safer indoor environments. Continuous research, regulatory action, and public awareness remain crucial in managing radon exposure and protecting homeowners, real estate clients, and families alike.
High Radon? Don’t Panic: Your Guide to a Stress-Free Real Estate Closing
High Radon? Don’t Panic: Your Guide to a Stress-Free Real Estate Closing The good news is in: Your offer was accepted! After weeks or months of searching, countless property visits, and coordinating with your lender, you finally found the perfect house. Congratulations! Now you’re in the inspection period — a vital stage for uncovering any potential issues. You’ve reviewed the reports and discovered that the radon levels are high. Stop, take a breath, and don’t let this be a deal-breaker. Should High Radon Levels Be a Deal Breaker? Absolutely Not. High radon levels during a home inspection are a common issue, especially in regions like Louisville and Southern Indiana. The good news? Reducing them is usually straightforward — and can often be completed in less than a day. Cost Reality: The cost typically ranges from $1,000 to $3,000, with the average professional radon mitigation systemcosting around $1,400. Who Should Pay for the Mitigation System? This is where the negotiation begins. The discussion about who will cover the installation of the radon reduction systemtakes place during the resolution period of the real estate transaction. Seller Pays: Sometimes the seller will pay for and coordinate the installation directly. Seller Offers Credit: Other times, they may offer the buyer funds (a credit) to handle it after closing. Our Recommendation for Buyers We strongly recommend that the buyer handles the radon mitigation. Why? Quality Control: You ensure that corners aren’t cut and that the highest quality methods and materials are used. Family Focus: You can make long-term decisions with your individual family’s health and safety in mind. 7 Key Considerations for a Quality Radon Mitigation System Odds are many of your neighbors have a system installed and you never noticed. Protect Your Family with a Proven Radon Mitigation Method If you or the seller moves forward with mitigation, keep these factors top of mind: Cost vs. QualityBe wary of cheap mitigation methods. Costs vary based on the home’s foundation (crawl space, slab, sump pump). A cheaper installation could lead to issues later. A basic system might not address all necessary areas, such as sealing a sump-lid or caulking floor cracks — all of which can substantially reduce long-term exposure. Aesthetics MatterAs the future homeowner, you will want some input on the placement and appearance of the exterior mitigation system. Hire a Certified ExpertEnsure the work is done by a certified professional. Look for certifications from the NRPP, AARST, or other accredited organizations. Installation must meet EPA radon standards. Meet the DeadlineConfirm that the mitigation company can finish the job to meet your closing deadline. Get a WarrantyYour system should come with a warranty, typically for the fan (around five years). The installer should also provide documentation on system operations and maintenance. The Crucial RetestAfter installation, it is vital to retest your home for radon levels. This step is often overlooked! The installer may conduct the retest, or you can use a third-party service to ensure impartiality. Make sure it’s done. Functionality CheckJust because a system is present doesn’t mean it’s reducing radon levels effectively. A professional retest confirms the system is functional and compliant. Stress-Free Radon Mitigation: Clear Pricing & Self-Scheduling Buying or selling a home comes with enough stress. That’s why we eliminated the guesswork from radon mitigation services in Louisville and Southern Indiana with clear, upfront pricing and a simple self-scheduling model designed for your specific needs. Stop guessing and start scheduling. Choose the package that works best for you: Our Mitigation Packages Passive2Active Package Designed for newer homes with existing passive radon systems that need professional activation. $ 749 00 7 Year Transferrable Fan Warranty 4 Point Pipe Routing Inspection (Securement, Slope, Suction Point, Roof Boot) Manometer Includes 48 Hour Post Mitigation Test Schedule Service Prepared2Sell Package Our most basic, budget-friendly radon mitigation for residential slab and basement foundations. It meets NRPP standards for real estate sales and is the top choice for home sellers. $ 1,299 00 5 Year Transferrable Fan Warranty Electrical Work Performed by a Licensed Electrician Manometer Professional Post Mitigation Radon Test to prove systems effectiveness Schedule Service HomeOwner’s Package Most popular package. It includes everything in the Prepared2Sell, plus critical upgrades homeowners value most. Designed for residential slabs and basement foundations, it meets NRPP standards with enhanced features for system longevity and safety. $ 1,599 00 7-Year Transferable Warranty on Energy-Efficient, Quiet Fan Electrical Work Performed by a Licensed Electrician Noise Reducer Rodent Protector Manometer Continuous Radon Monitor: 24/7 Real Time Readings on Radon Levels Schedule Service Most popular Crawlspace Solutions Your crawl space is the source of up to 40% of the air you breathe. Our encapsulations are expertly built to last and to shield your family from the effects of radon and can also improve high humidity, mold, and termite issues, protecting both your health and your home’s value. $ 1,100 00+ Our air-tight built to last encapsulations include: Barrier: Heavy-Duty, Fiberglass Reinforced Vapor Barrier Installation & Fastening: Securely, Mechanically Fastened Barrier Airtight Sealing: Caulked Walls, plus Taped and Caulked Seams Airflow & Access: Corrugated Perforated Piping and Dedicated Entry Stands Schedule Consultation Circumstantial-Add Ons For more complex homes (due to size, very high radon levels, or multiple foundation types), we may recommend circumstantial add-ons to ensure optimal performance. These enhancements address unique entry points and structural needs: Fan Upgrade: The optimal radon fan for a system is selected based on variables like the home’s square footage, sub-slab material, and the required number of suction points. (Custom Pricing) Air-Tight Sump Lids: Securely seal open sumps to prevent radon entry and basement humidity ($349.00). Additional Suction Points: Essential for effectively reducing radon in large or complex foundation layouts ($299.00). Foundation Crack Caulking: Sealing floor cracks to eliminate radon pathways ($3.50 per linear foot). Foam Sealing Entry Points: Seal common leakage areas, including pipe penetrations, block wall cavities, and the spaces beneath basement tubs and showers (Custom Pricing). Pipe Size Upgrades: Engineered to increase suction based on your home’s specific square footage and sub-grade material composition (Custom Pricing). Pipe Insulation: Prevents mildew, mold, and drywall moisture caused by condensation on pipes internally routed